Deploy a Strapi CMS backend
Cleavr provides a first-class experience for setting up your servers and deploying your Strapi CMS apps.
Cleavr also offers a GitHub Action integration so that you can build Strapi apps on GitHub as opposed to your server. This saves server resources during the deployment process, plus allows you to deploy Strapi to a lower-cost server, which may typically experience out-of-memory errors when building Strapi applications.
This guide will walk you through setting up your Strapi app as well as provide some pointers if using our GitHub Actions integration to build your apps.
Prerequisites
Have a server provisioned and ready to go.
When provisioning the server, select server type App Server or NodeJS Optimized.
If using Node Optimized, make sure to select an even version of NodeJS. Also, Node v16 can be used for Strapi v4 or later.
Step 1 - Add Strapi site to your server
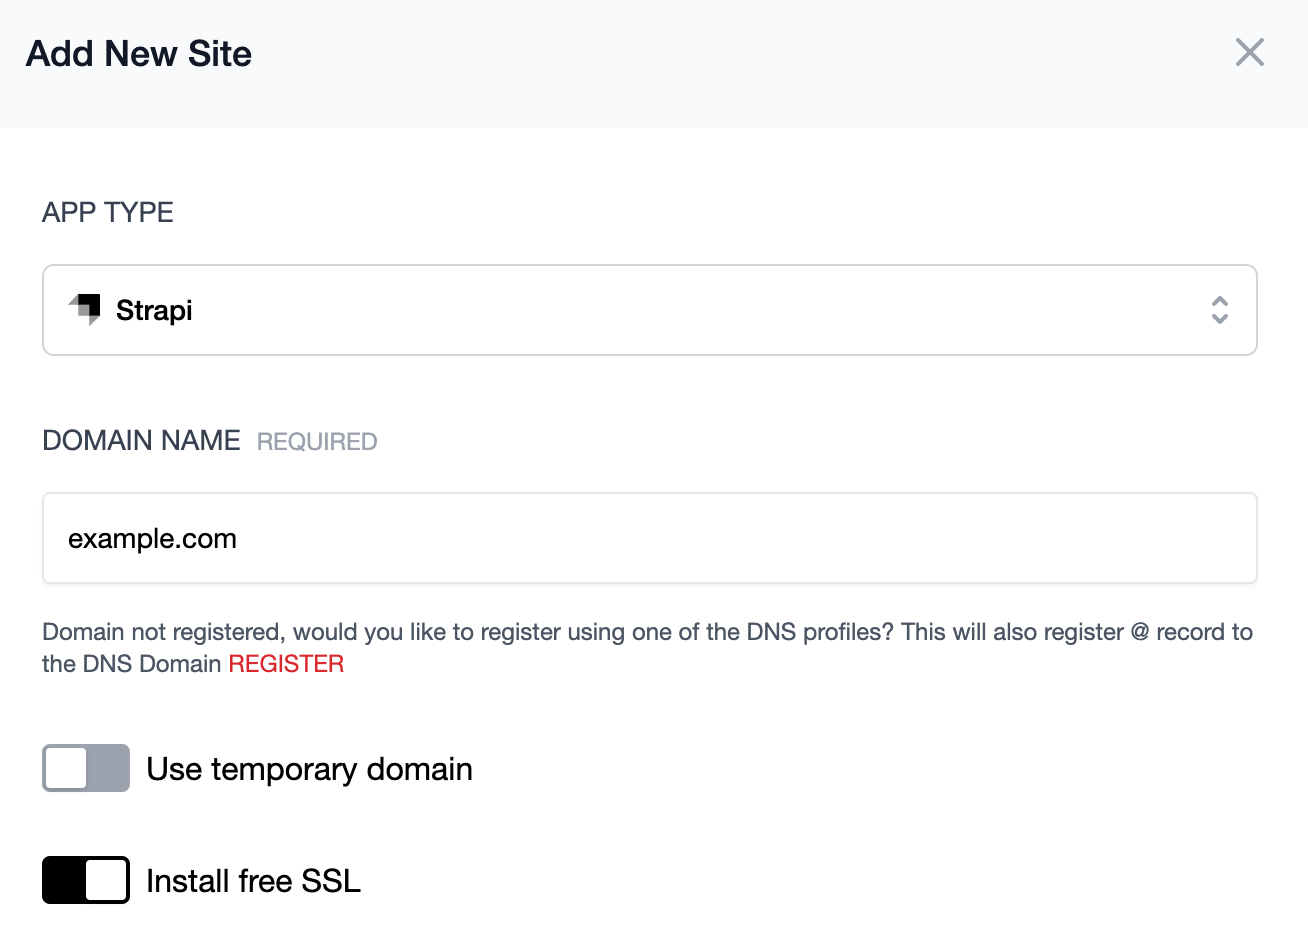
In Cleavr, navigate to the server you want to add your Strapi app to and click the Add Site button.
For App Type, select Strapi.
Fill out the domain info.
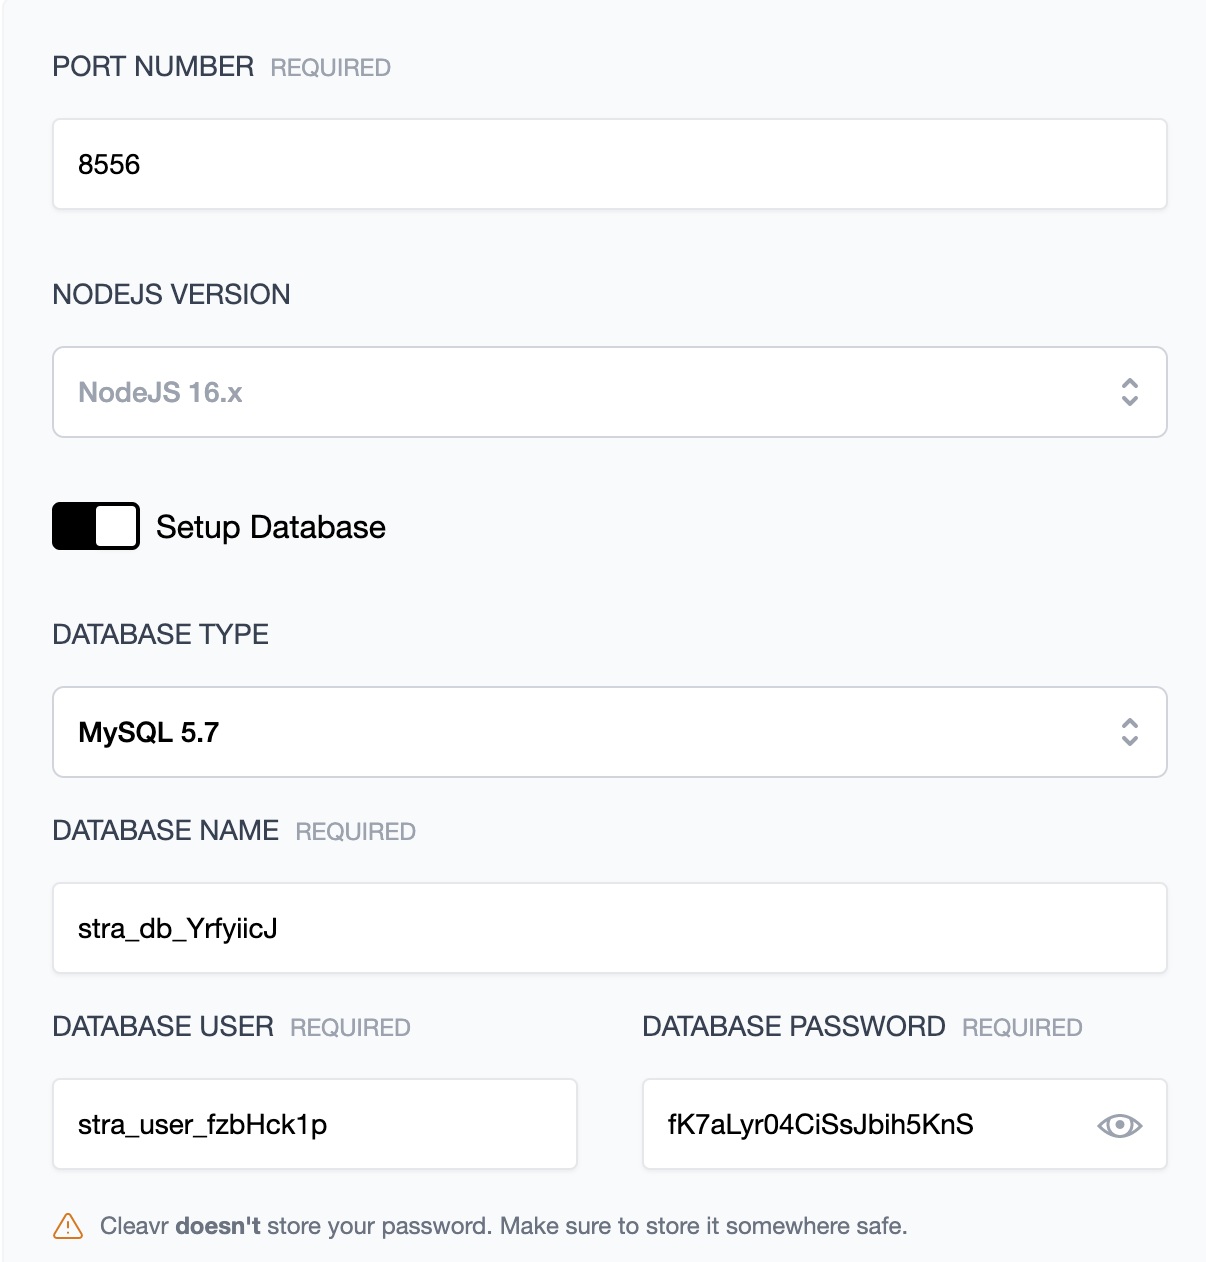
Expand the Advanced Options section. If NodeJS has not already been installed on the server, select which version you want installed.
For Strapi v3, select either Node v12 or v14. If you are using Strapi v4, then you may use Node v16.
Under advanced options, you can also choose to install a database server as well as add a database and database user. If you enabled this option, Cleavr will automatically add the db connection variables to the .env.
Click Add to add the site.
Step 2 - Configure Deployment Workflow repository
Once the site installs successfully, click on the Setup and deploy link. This will take you to the deployment workflow settings for the new deployment workflow.

Select your VC profile and then enter the Repository and Branch to Deploy info for your project.
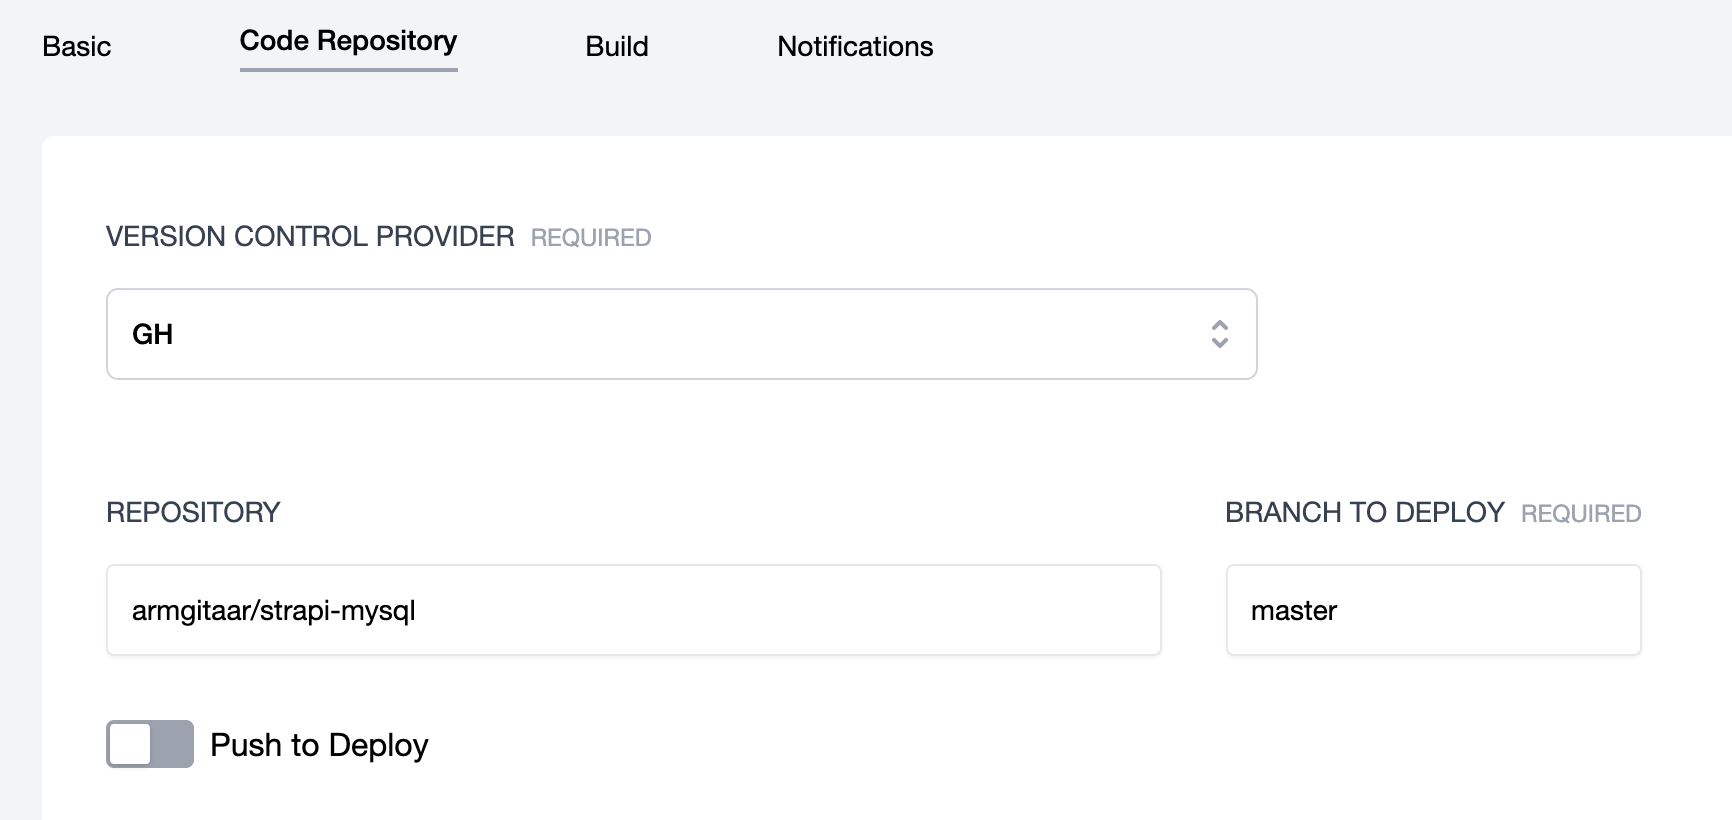
Click Update.
Step 3 - Make additional configurations
Your deployment workflow may need additional configurations.
Three likely places for further configuration are:
- In settings > build where you can edit build and PM2 Ecosystem settings if needed
- In the Environment section if you need to adjust your
.envvariables - In the deployment hooks section if you need to run additional commands during deployment
Step 4 - Deploy!
You are now set to deploy your app! 🚀
GitHub Action Integration
If your code is on GitHub, you can enable GitHub Actions to build your project using GitHub Actions.
To enable GitHub Actions, go to the deployment workflow settings and click the GitHub Actions tab. Enable GitHub Actions and then click the Update button.
This will add a workflow file to your project. You may edit this file to add additional tests if you'd like. This will also trigger an initial build and deployment for your app.
If your app needs Environment variables, such as db connection variables, there is one modification you should make. The GitHub Actions process doesn't pull from the .env file once everything is deployed so you will need to add the db connection information to the PM2 Ecosystem configuration located in settings > build.
Add your connect variables to the env section of the PM2 Ecosystem.