Deployment Workflow Settings
Configuring your deployment workflow's settings is one of the first things you'll want to do to setup your deployment workflow.
Basic Settings
On the basic settings tab, you can find and update some information for your workflow, including changing the workflow's name and add tags.
Deployment Trigger Hook
The deployment trigger hook can be used in external tools to trigger deployments on Cleavr.
For example, if you have your own GitHub Actions workflow, you can use this hook to trigger the deployment when action is completed.
You can try out the deployment hook using a curl command:
curl -X POST https://deploy-trigger-hook-url
Code Repository
You'll need to designate the code repository for Cleavr to pull the code for your deployment from.
Select the Version Control Provider to use, which is the VC Profile.
Select the Repository name. You can add in the full url or the user/repo format.
You may any repo that your VC Profile account has access to. If using GitHub, you may also use any public repository.
Designate which Branch to deploy.
Enable Push to Deploy if you'd like to have your web app automatically deploy when changes are committed to the repo / branch.
To enable push to deploy, you must be an admin on the repository. Per Github: Only members with owner privileges for an organization or admin privileges for a repository can manage webhooks for an organization. If you get a permission error when enabling push-to-deploy, check your VC account and check to see if you've reach a maximum of allowed webhooks. For example, GitHub allows 20 webhooks per repository.
Monorepo
Include an App Folder location if your app is in a sub-directory of the main repository.
You will need to create a new site & deployment workflow for each app that is under a sub-subdirectory. For example, if one sub-directory is for the 'frontend' and another for the 'backend', then you'd create a site and deployment workflow for both the frontend and backend.
You can add a custom deployment hook to the backend deployment's list of hooks and use the deployment trigger hook to automatically trigger the frontend after the backend deployment is completed.
Build
This tab is typically available, and most useful, for NodeJS type applications, including Nuxt and Adonis.

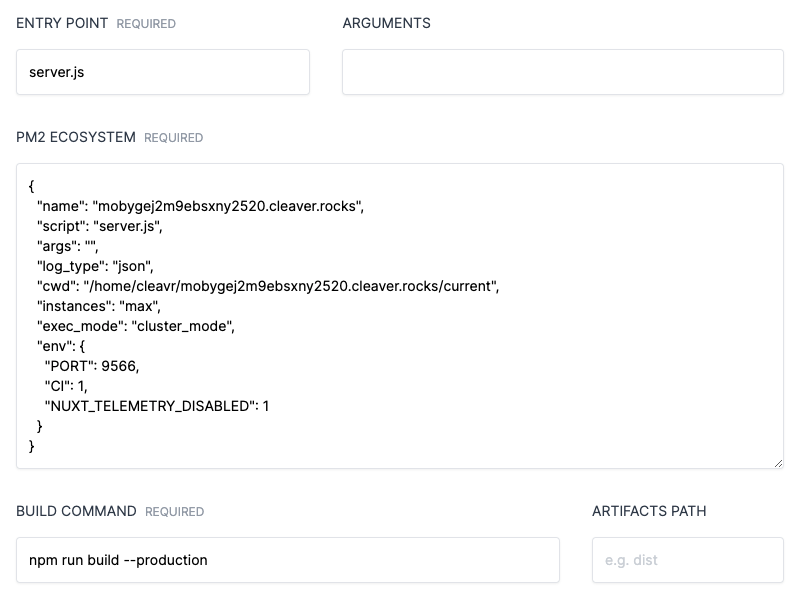
Entry Point and Arguments
Refer to your package.json file and check to see what start script is being used. This will often designate a file type of index.js, server.js, main.js, etc.
Make sure your entry point reflects what's in package.json.
Some NodeJS-based apps, such as Nuxt, has a run command that looks like nuxt start. For these, use npm as the Entry Point and start as the Argument.
You may also use 'yarn' for entry point start commands - though, you'll likely need to update the PM2 Ecosystem, which you can see instruction for below. However, Cleavr automatically look for `yarn.lock` when running build, so we recommend using npm to avoid extra work and other potential issues.
PM2 Ecosystem
There may be some instanced where you want to modify the PM2 Ecosystem script. Typically, this might be when you want to include an environment variable or if you want to use yarn.
Environment variables
You can add environment variables to be injected by PM2 here. If you are using a .env file, then this should not be necessary. However,
it could be that if you are using dotenv then you may need to make modifications to your code so that your app looks for the .env file.
const path = require("path");
require("dotenv").config({ path: path.join(__dirname, ".env") });
If not using .env for environment variables, then you may add them to the env section of the PM2 Ecosystem.
Yarn start script
We recommend using npm first. Cleavr automatically will look for yarn.lock and will use yarn to build the app. If you want to use
yarn to run the app, then some modifications to PM2 Ecosystem script may be necessary as PM2's default interpret is set to node.
Mainly, add "interpreter": "/bin/bash" to the script.
{
  "name": "example.com",
  "script": "yarn",
  "args": "start",
  "log_type": "json",
  "interpreter": "/bin/bash",
  "cwd": "/home/cleavr/example.com/current",
  "instances": "max",
  "exec_mode": "cluster_mode",
  "env": {
    "PORT": 7996,
    "CI": 1
  }
}
Build Command
The default build command is npm run build --production. Update accordingly if your app uses a different build command.
Artifacts
If build outputs artifacts into a new directory, add the directory here. A common output directory is dist.
GitHub Actions
If your code is on GitHub and is a NodeJS-based app, consider using GitHub Actions.
Learn more about our GitHub Actions integration here.
Notifications
You can select what types of notifications you want to receive for deployments here.
