Backup Profiles
You can backup your database and files on a remote SFTP server, Backblaze, Wasabi, AWS S3, Digital Ocean Spaces, or on a local directory on your server.
When adding a new connection, Cleavr will verify the access tokens to ensure Cleavr can connect to your account.
Backblaze
The following are specific or important to know for Backblaze backups.
- Application Key ID - enter the key ID for the Backblaze API
- Application Key - enter the key for the Backblaze API
- Bucket - enter the Backblaze bucket name you created (case sensitive)
- Endpoint - enter the endpoint URL for the bucket
When adding a new Application Key in Backblaze, if you select a specific bucket under the 'Allow access to Bitbucket' dropdown instead of selecting the 'all' option, the you will also need to enable the 'Allow listing all bucket names including bucket creation dates (required for S3 List Bucket API)' checkbox option.
Wasabi
The following are specific or important to know for Wasabi backups.
- Key - enter the key for the Wasabi API
- Secret - enter the secret for the Wasabi API
- Bucket - enter the bucket name you created (case sensitive)
- Region - enter the data region that the Wasabi bucket is located
AWS S3
The following are specific or important to know for S3 backups.
- Key - enter the key for the user that has appropriate privileges to write to S3 bucket
- Secret - enter the secret for the above identified user
- Bucket - enter the S3 bucket name you created (case sensitive)
- Region - enter the data region that the S3 bucket is located
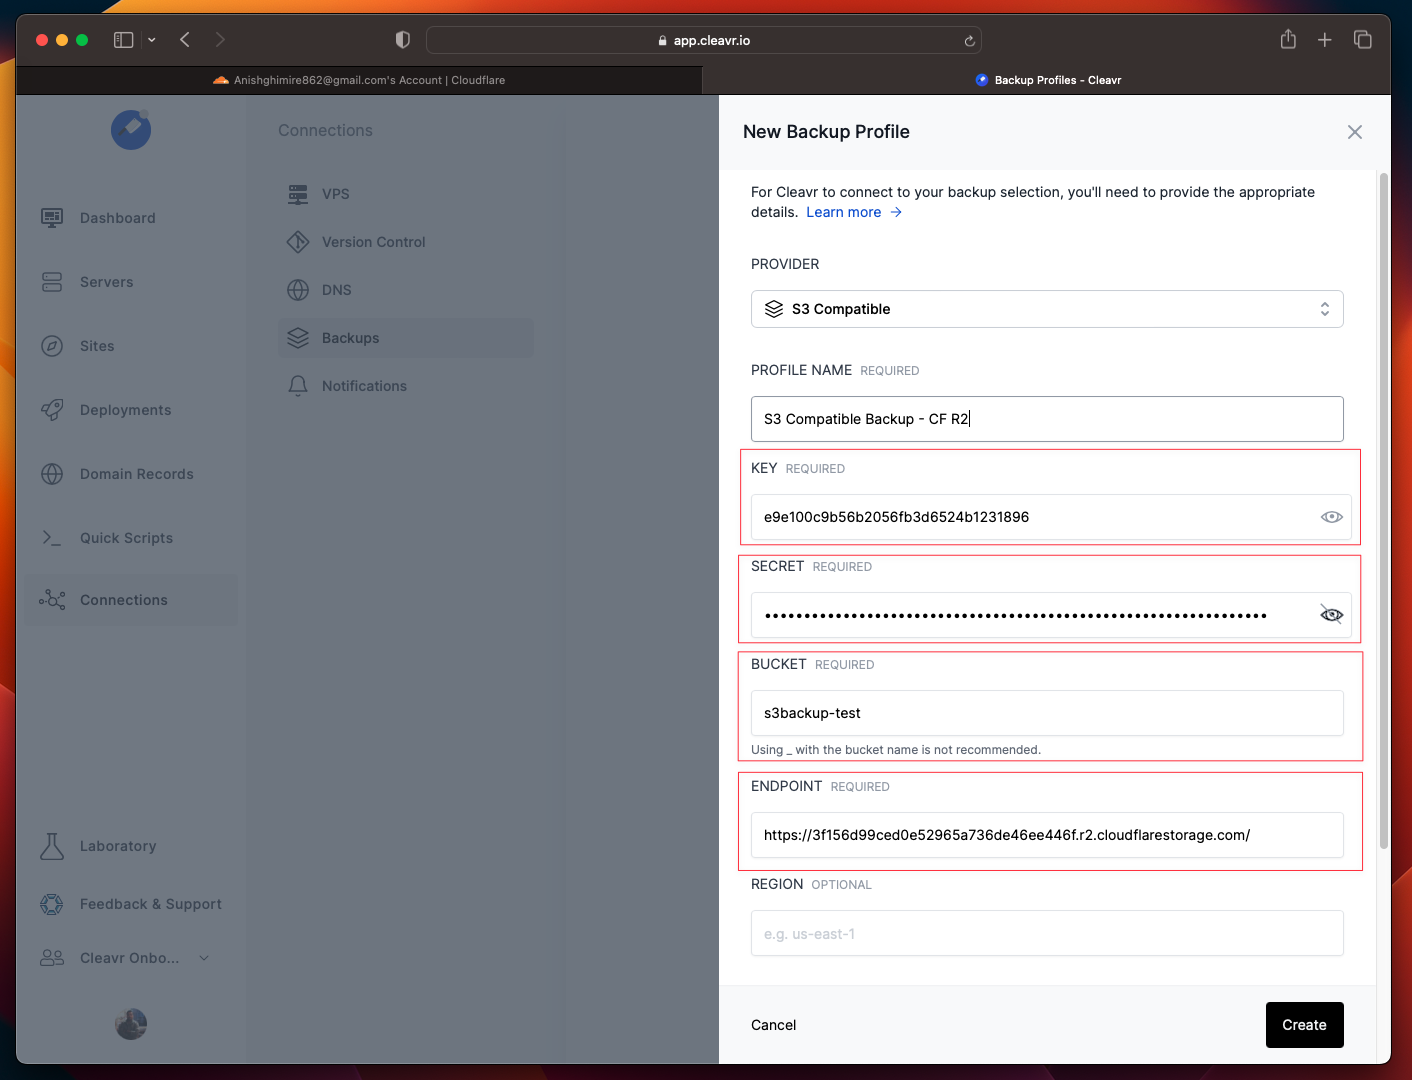
S3 Compatible
Does your preferred provider us an S3 compatible API and is not listed as a Backup Profile provider? Then try this option to connect to your provider.
The following are the list of S3 Compatible backup providers that are verified to work with Cleavr. The list also contains details on which parameters to use where to find them.
Cloudflare R2
- Key and Secret: To find the key and secret go to Cloudflare Dashboard > R2 > Overview > Manage R2 API Tokens > Create API Tokens.
Grant
Editpermission to the new token and selectTTLfor the new token.
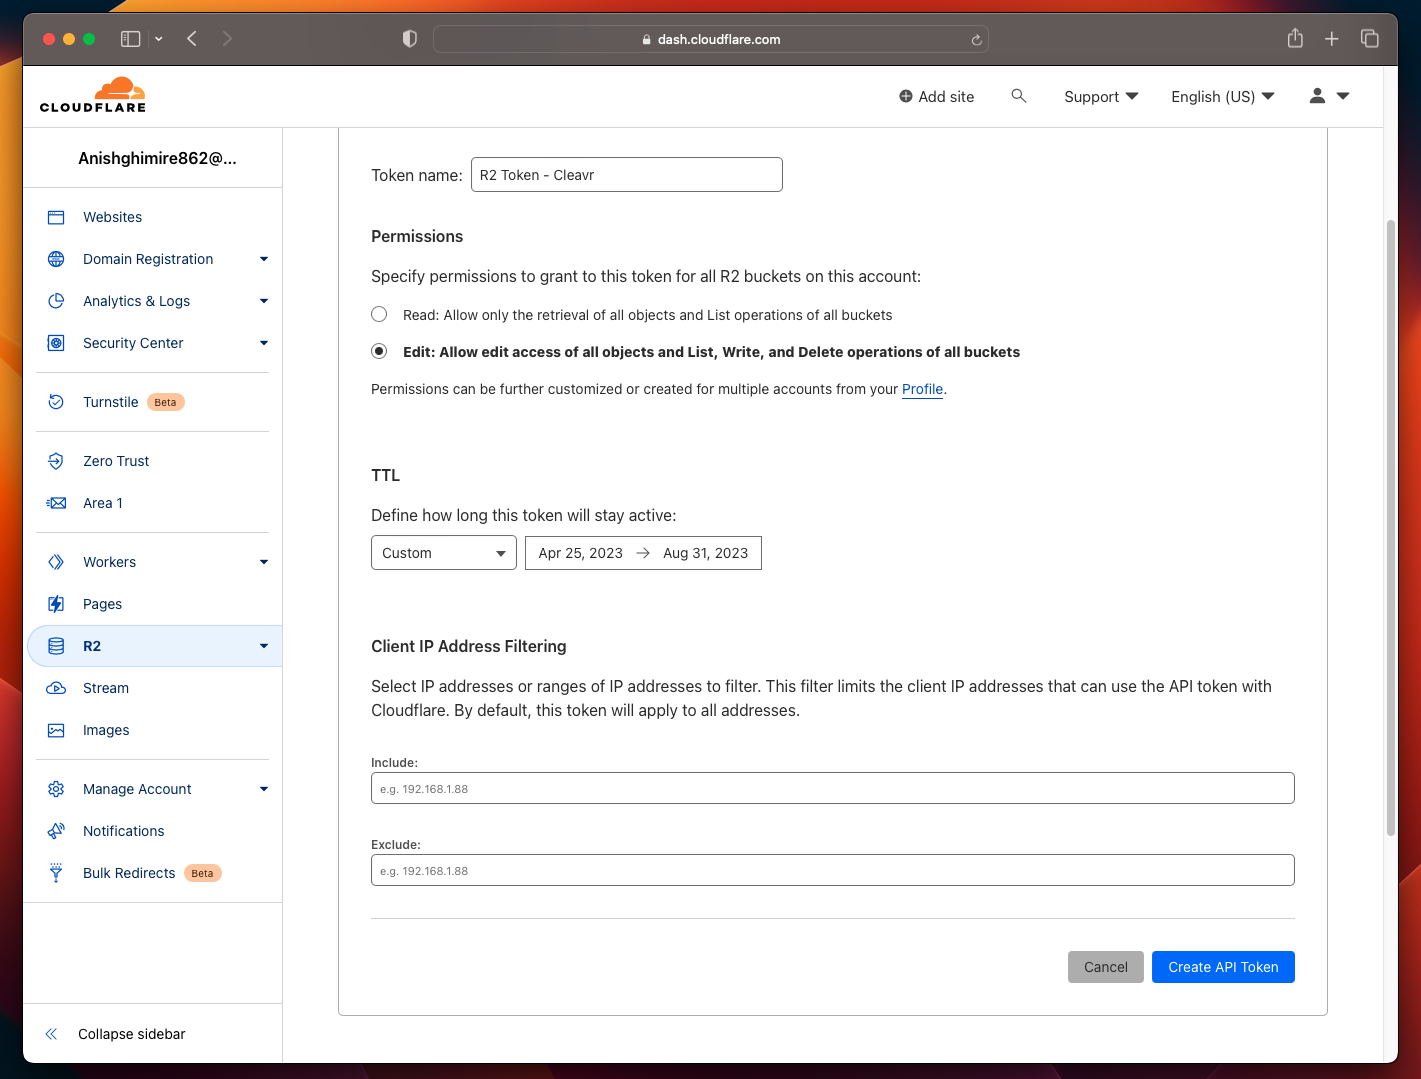
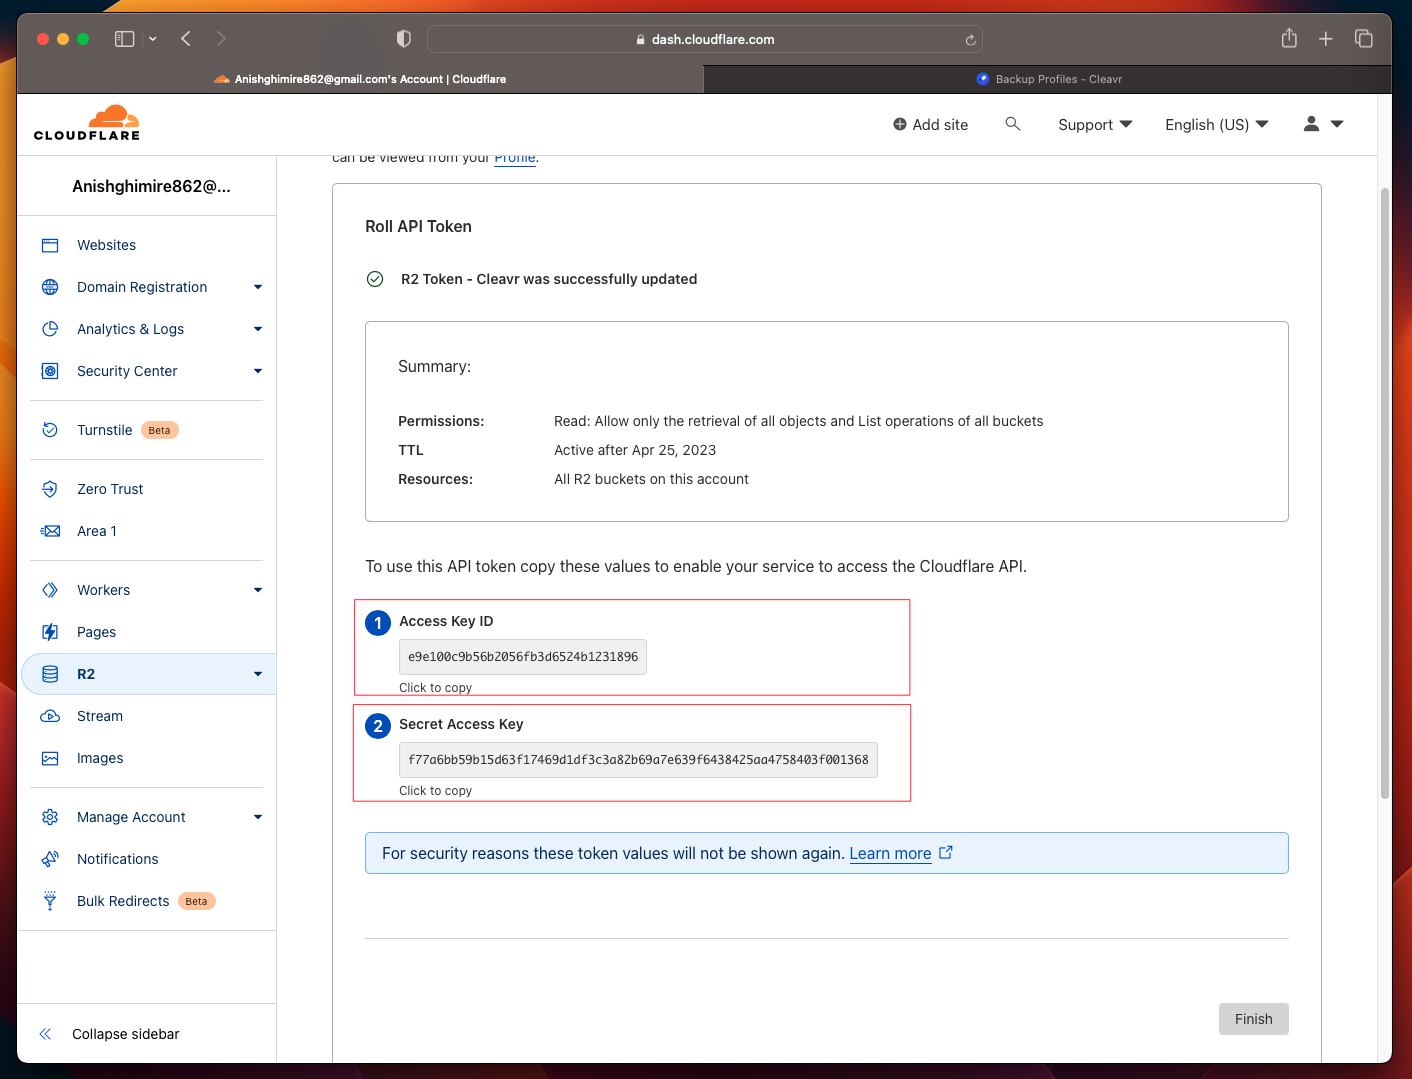
Once the token is created copy the Access Key ID, Secret Access Key and paste them to Key and Secret input fields respectively.
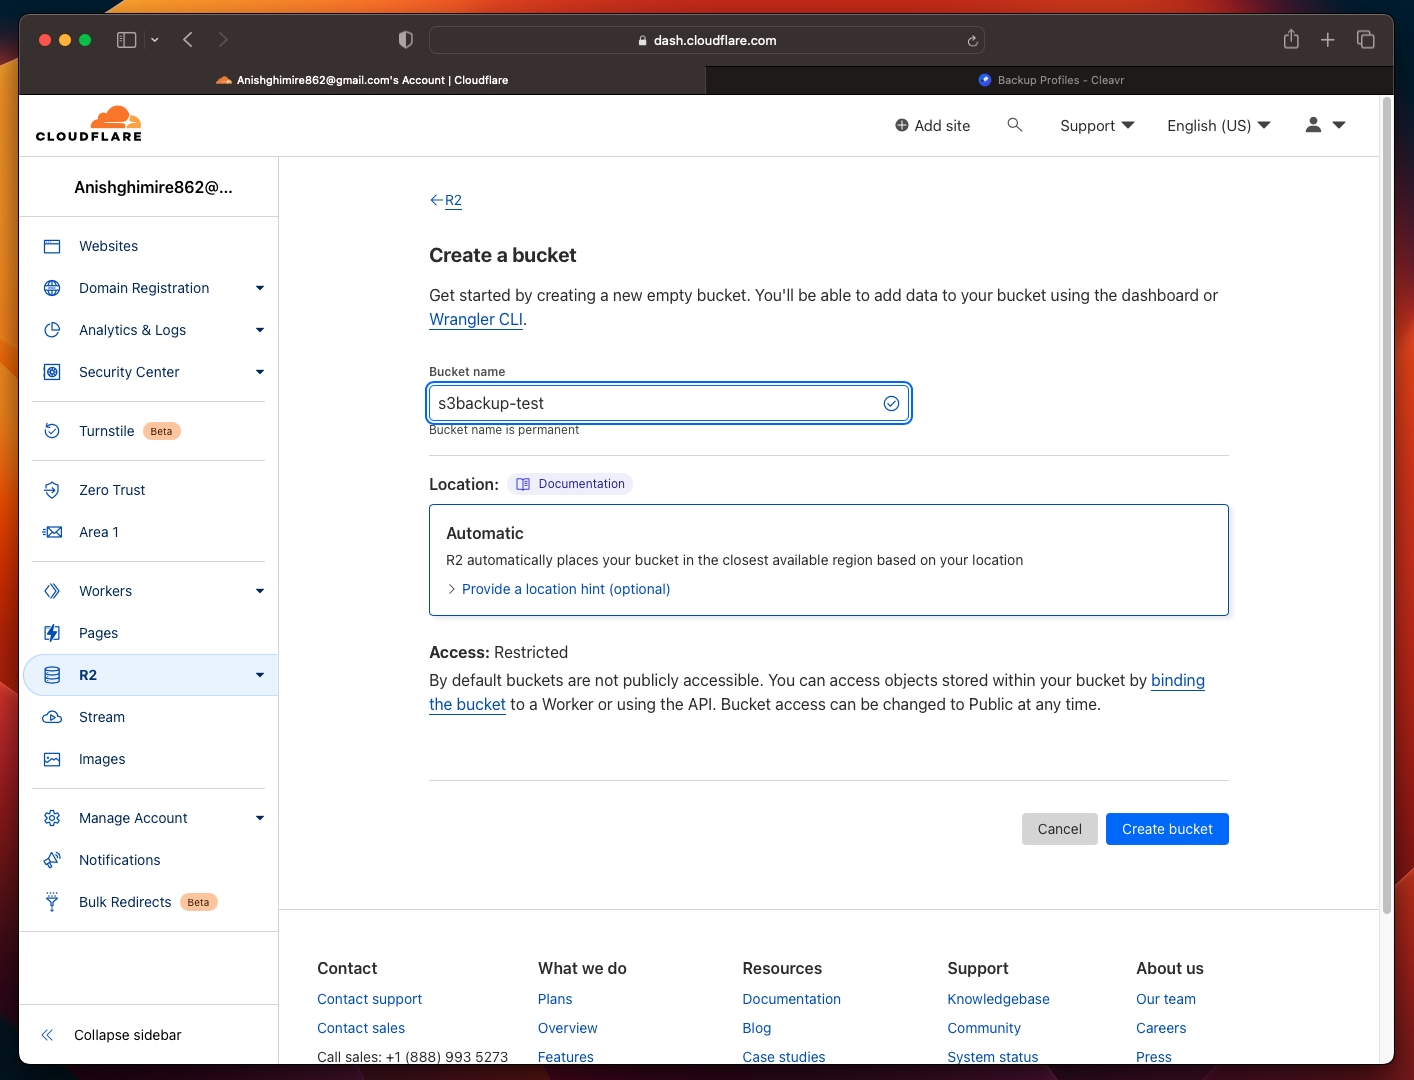
- Bucket: To create a bucket navigate to
R2>Overview>Create Bucket. Once the bucket is created enter the name of the bucket to theBucketinput field in Cleavr.
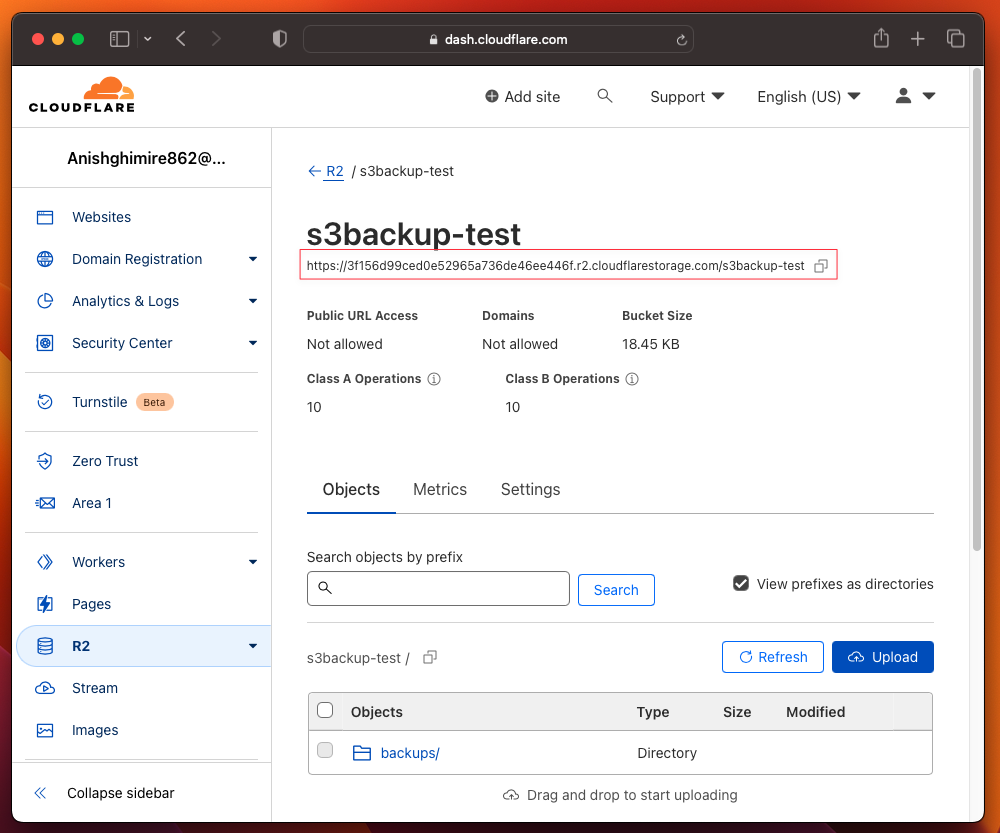
- Endpoint: Click on the bucket name from
R2>Overviewto get the endpoint. Copy the endpoint and enter the URL you copied to theEndpointinput field.
OVHcloud
- Key and Secret: You can access this information in the
S3 userstab in your OVHcloud Control Panel. Enter the details respectively on theKeyandSecretinput fields. - Bucket: Enter the S3 bucket name you created from OVHcloud.
- Endpoint: Click on the name of your bucket to view its details. On the details page you can find
Endpointof your bucket. - Region: Region is selected while creating
Object Container. Make sure to use lowercase value for the region. For e.g.: if the region you've selected isGRAmake sure to providegraas the value for region. You can also find region in your endpoint. If your endpoint ishttps://s3.gra.perf.cloud.ovh.netthe region will begra.
DigitalOcean Spaces
The following are specific or important to know for DigitalOcean backups.
- Key - enter the key for the space
- Secret - enter the secret for the space
- Origin URL - enter the origin URL for the space and exclude bucket name from URL; should look similar to
https://nyc3.digitaloceanspaces.comwherenyc3is the data center location. The origin URL is visible on the main page for your DO space.
SFTP
Setting up an SFTP server is a little more involved than the other backup methods.
Let's go through a step-by-step process for setting up SFTP backups.
Step 1 - Create a private / public key pair
We need to set up a new key pair. We'll perform this step using a terminal command.
Open your terminal and run the following command.
ssh-keygen -t rsa -b 4096 -C "{enter your email}" -f ~/Desktop/id_rsa_backup
Be sure replace {enter your email} with your actual email within quotes. When running the above command, we are also bypassing the catchphrase entry.
Running the command will output the key pairs on your desktop.
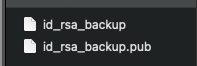
In the next step, we'll use the id_rsa_backup private key and add it to the Backup Profile.
Later, the id_rsa_backup.pub key will be added to the target server where our backups will be loaded to.
Step 2 - Add new SFTP backup profile
In Cleavr > connection profiles > backups, click Add New Backup Profile.
For Provider, select SFTP.
Add a Profile Name.
For Host, add in the target server's public IP address.
For Username, add in the username that the backup will use to access the SFTP server via an SSH connection. As an example, we'll use the cleavr username in this example.
On your desktop, locate the id_rsa_backup private key, open the file and copy the contents. You'll then paste to the Private Key field.
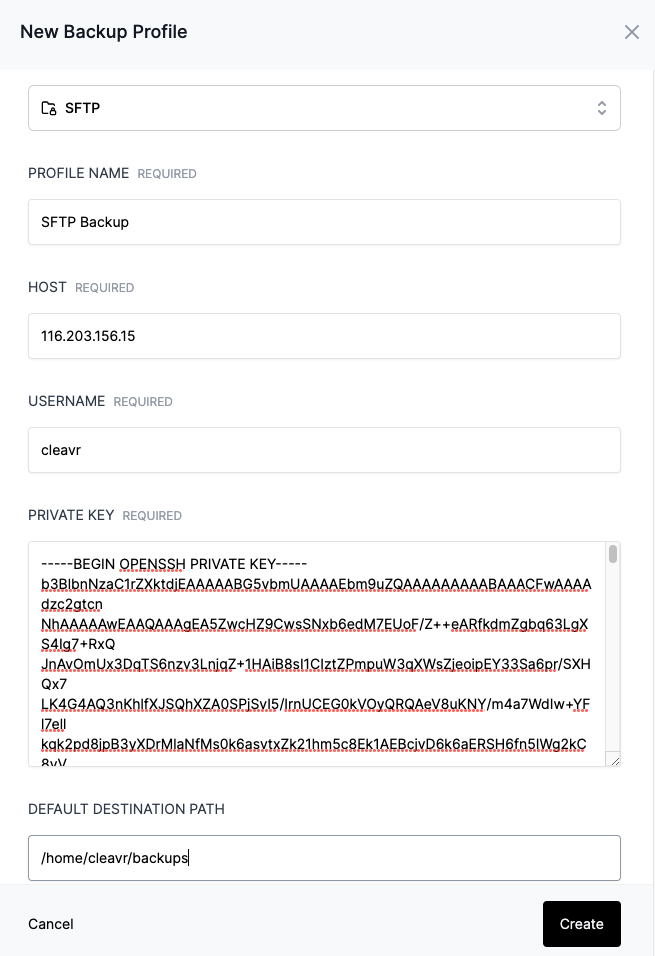
Include the header and foot for the key, ie: ---- BEGIN/END PRIVATE KEY ----
Add a Default Destination Path. If you are using a system user, such as cleavr, be sure that the path at least include a path that is accessible by the system user. Such as /home/cleavr/backups.
Include and folders and files to ignore, comma separated.
Click Create to add the new profile.
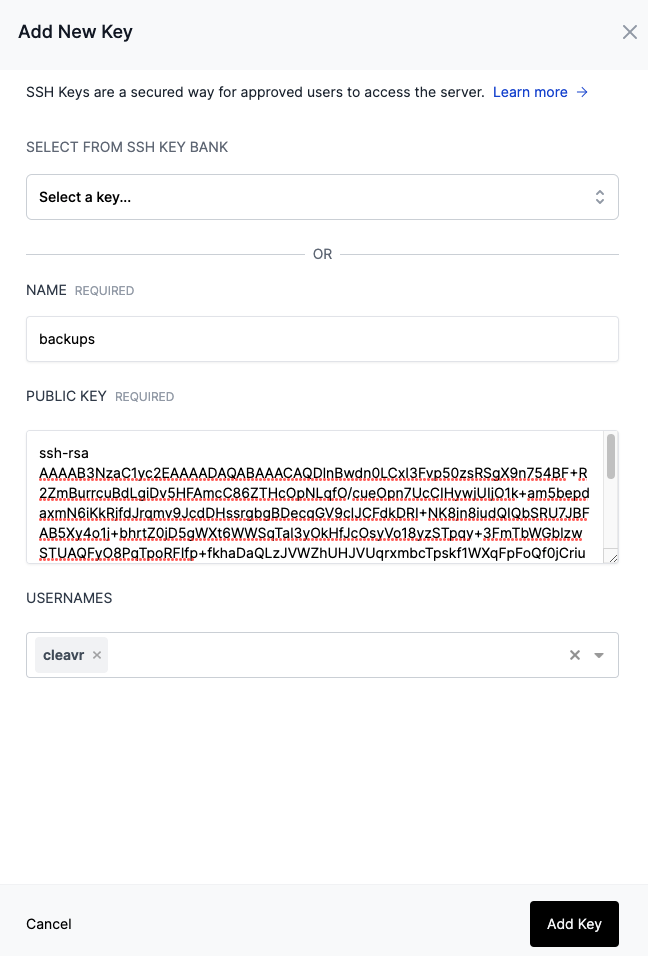
Step 3 - Add public key to target server
To complete the SFTP setup, you'll also need to make sure to add the public key to the target server. For the host server, assuming it is a Cleavr managed server, navigate to the server > SSH keys section.
Click Add New Key.
Add a Name to refer to the key by.
Open the id_rsa_backup.pub public key on your desktop, copy the contents, and paste it into Public Key.
Lastly, apply the same username to the key that you applied to the SFTP Backup profile in the previous step.
Click Add Key.
You should be ready to create a new backup using the SFTP profile.